1.11 Edit FB
1.11.1 Display the FB
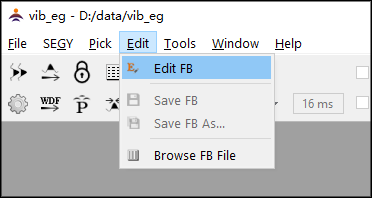
Step 1
As in Fig.1-11-1, select the menu "Edit->Edit FB", or click the icon
to open the dialog (Fig.1-11-2).
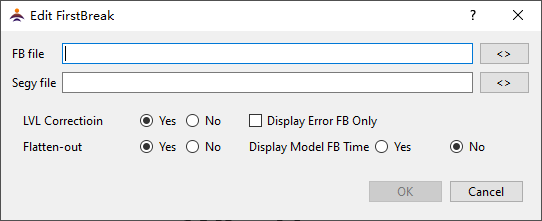
Step 2
Select the FB file "vib_eg_Encrypted.sgy_8ms_1byte_n.cal" and its related SEGY file(Fig.1-11-3). Click "OK" to display the FB as shown in Fig.1-11-4. The data is displayed with the corrections by default.

1.11.2 Edit the FB
• Correct and error FB
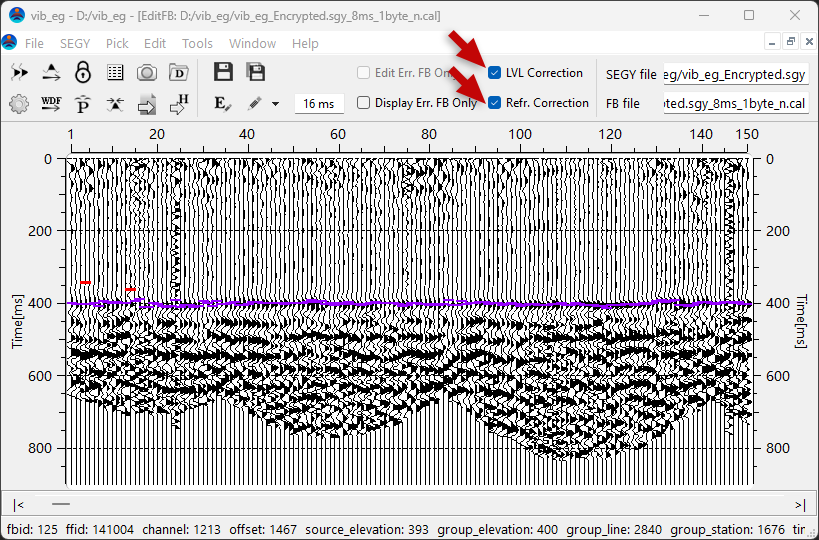
As shown in Fig.1-11-4. There are 2 type of FB symbols, the dashes in purple and red.
Dash in purple: basically correct, which is judged by the near-surface modelling.
Dash in red: probably not correct, which is judged by the near-surface modelling.
Note: the "purple" FB may not be correct due to poor precision of modelling in some 3D region, or some segment of 2D line.
• Display FB with correction
In Fig.1-11-4. The FB is displayed aligned to a time line (e.g. 400ms) so that it is easy to edit for the processor.
If we uncheck "LVL Correction" and "Refr. Correction", the FB will be dispalyed with no correction (Fig.1-11-5).

• Scroll and locate data
The tools shown in Fig.1-11-6 are for scrolling and locating data.
Click on either side of the slider, the data will scroll forward/backward by a number of screens, which can be set in the dialog of display setting (the icon
) by "bulk step".
Click the small arrow "<", or ">" at the both of ends of slot, the data will nudge forward/backward by a number of traces, which can be set in the dialog of display setting by "tuning step".
Put the cursor in the slot, click the right mouse button and select the menu "to specified ffid", you can exactly locate to a shot you want.
There are 2 function keys, F2 and F3, which scroll the data forwards / backwards by only one screen. They are normally used for mannually editing the FB.

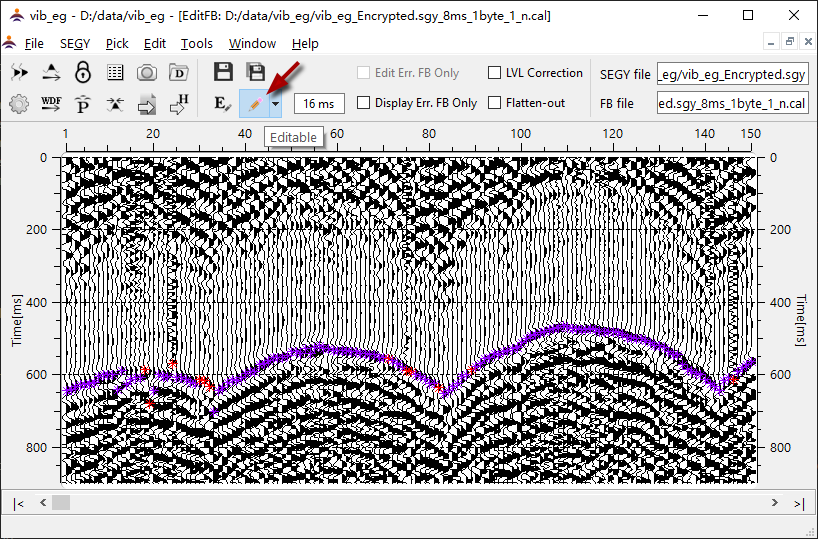
• Enable edit mode
As the red arrow shown in Fig.1-11-7, click the icon of pencil and make its background in blue, you can activate the edit mode.
Now if you move the cursor into the data area it will show as a cross other than an arrow.
• Basic edit operations
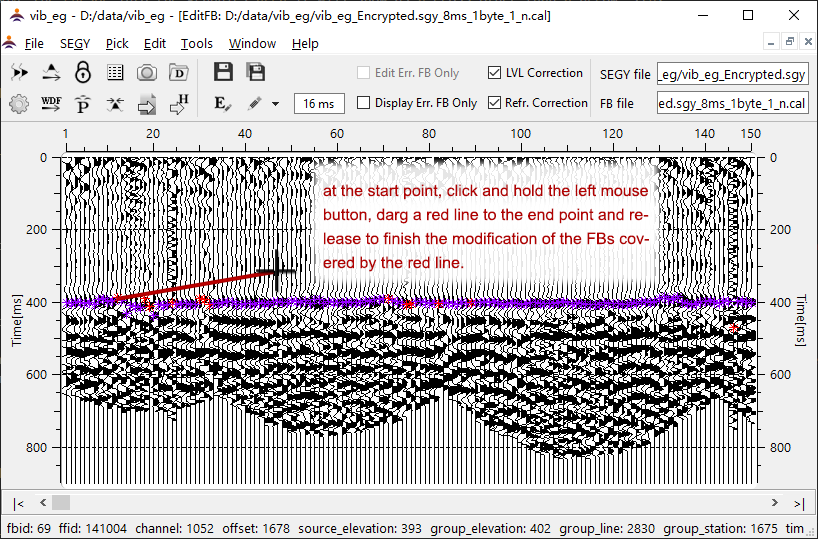
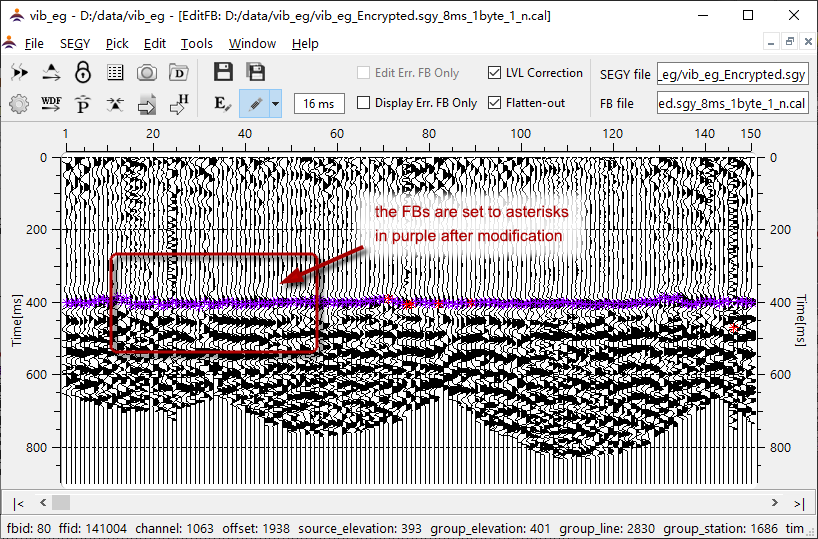
(1) Modify a segment of FB
As guided in Fig.1-11-8, you can complete the modification of a segment of FB. And the FBs modified will be in purple as shown the red box in Fig.1-11-9.
If you want to modify the FB of a specifical trace, just move the cursor at the trace's target time and click the left mouse button.
(2) Delete a segment of FB
As guided in Fig.1-11-10, you can delete a segment of FB. And the FBs deleted will be set to zero as shown in Fig.1-11-11.
If you want to delete the FB of one specifical trace, just align the cursor to the trace vertically and click the middle mouse button (or the mouse wheel).

(3) Time-gate for peak searching
As the arrow points in Fig.1-11-10, there is a spinbox to the right of the pencil icon, which includes a value, now is "16ms". Put the cursor into it and scroll the mouse wheel, you can set a favorite value. It sets the length of the time-gate, near which the cursor sweeps while editing. In this small time-gate the programe searchs the time of maximum value as the FB time.
(4) Save the FB
While editing, click the icon
to save the FB file at any time. The programe would save automatically every 10 minutes should the user forget saving.
Clickto save the FB file as a new name.
• High-efficient tools
(1) The context menus
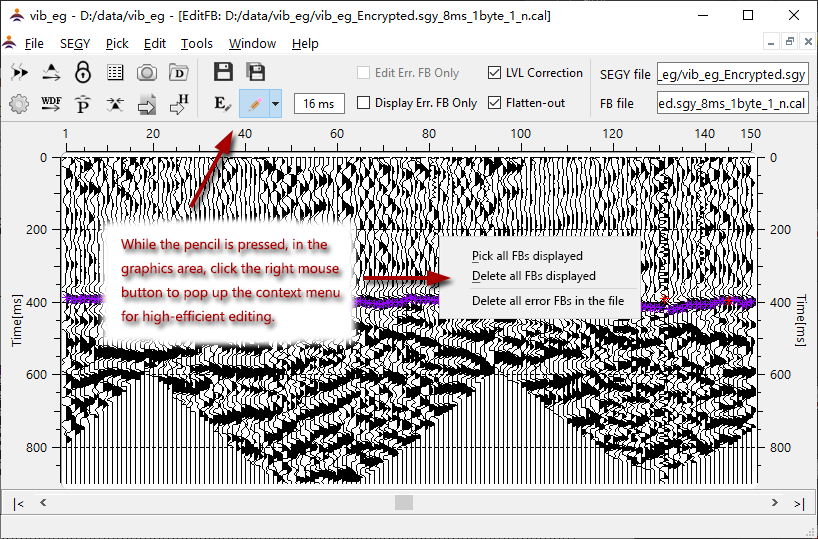
As shown in Fig.1-11-12, while in the edit mode(the pencil is pressed), you can pop up the context menus for high-efficient editing in the graphics area by clciking the right mouse button:
Pick all FBs displayed(shortcut key " Ctrl + t "): pick automatically all of the FBs in the screen along the model FB time(now align to 400ms).
Delete all FBs displayed(shortcut key " Ctrl + d "): set all of the FBs in the screen to zero.
Delete all FBs in the file: delete all of the error FB(in red) in the file. This operation needs to be confirmed by the user.
Note: be careful with "Delete all FBs in the file", after execution the data can not be restored!
(2) High-efficient edit mode
WiseUser has two type of edit modes, one is "All-FB" mode, another is "Error-FB-Only" mode.
"All-FB" mode: Display and edit all types of FB, which is like most of other applications for FB picking.
"Error-FB-Only" mode: Display and edit only the error FB( in red ), which is usually a small part of FB in the file.
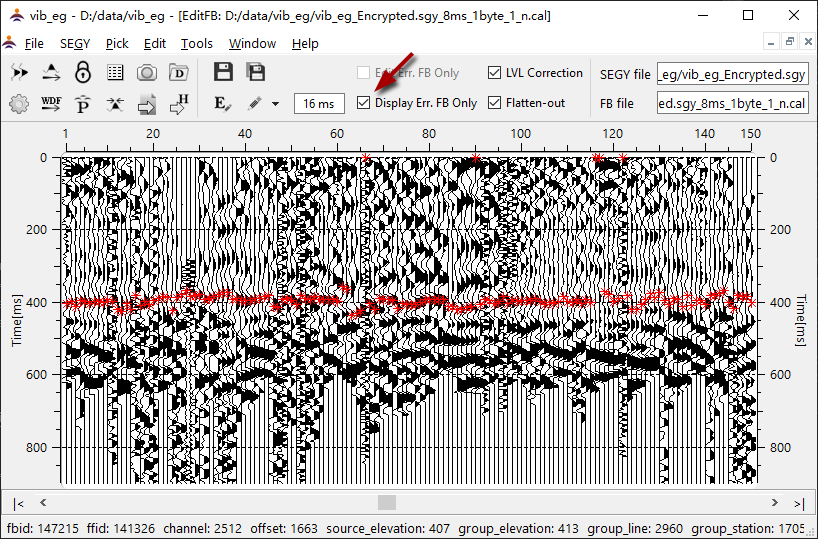
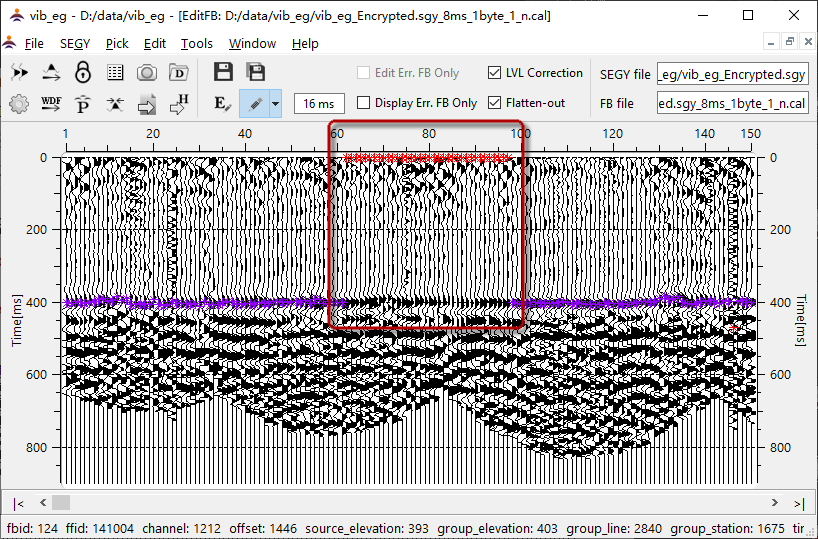
Check "Display Err. FB Only" on the toolbar, you would switch to the mode of "Error-FB-Only", as shown in Fig.1-11-13. In this mode the "correct" FB ( in purple ) is hidden, and the processor would focus on the editing of the error FB, which is much more efficient. This idea of FB edit is used only in WiseBreak and WiseUser, which developed by Wisedone Geophysical.
Note: any FB modification can not be undone!